
How to Use Jira for Project Management
Teams often choose Jira as a solution for issue tracking, but the software can also serve as a general project management platform to help you plan, track, and manage your agile software development projects — without having to do much extra work or install any additional software.
In fact, Jira includes a pre-built template that offers a simple workflow to help you coordinate resources and track tasks associated with a project. We’ll use this template as part of a step-by-step guide on how to get started with Jira for project management.
What is Jira?
Jira is software that was originally designed for developers and engineers, but it has evolved into a full-service project management platform that can help any team or department coordinate tasks. Jira also connects seamlessly with other Atlassian products such as Trello and Confluence, and it connects with many third-party tools as well.
One clarifying note before we dive in: This how-to guide will focus on how to use Jira for project management, not Jira Service Management (formerly Jira Service Desk). Jira Service Management offers additional tools for service teams, such as a customer-facing portal that allows them to submit support requests. While the software names are similar, and there is some overlap in features, these are two separate products that are not interchangeable.
Who is Jira for?
Due to its focus on issue tracking, Jira was originally created as a tool for software development teams, and it really shines in this area when compared to other general-purpose project management software. However, Jira can be used by teams of all kinds, and it offers templates for marketing, design, sales, operations, human resources, legal, finance, and more.
SEE: A Complete Guide to Software Development Project Management
How to use Jira for project management
Step 1: Choose a Jira project management template
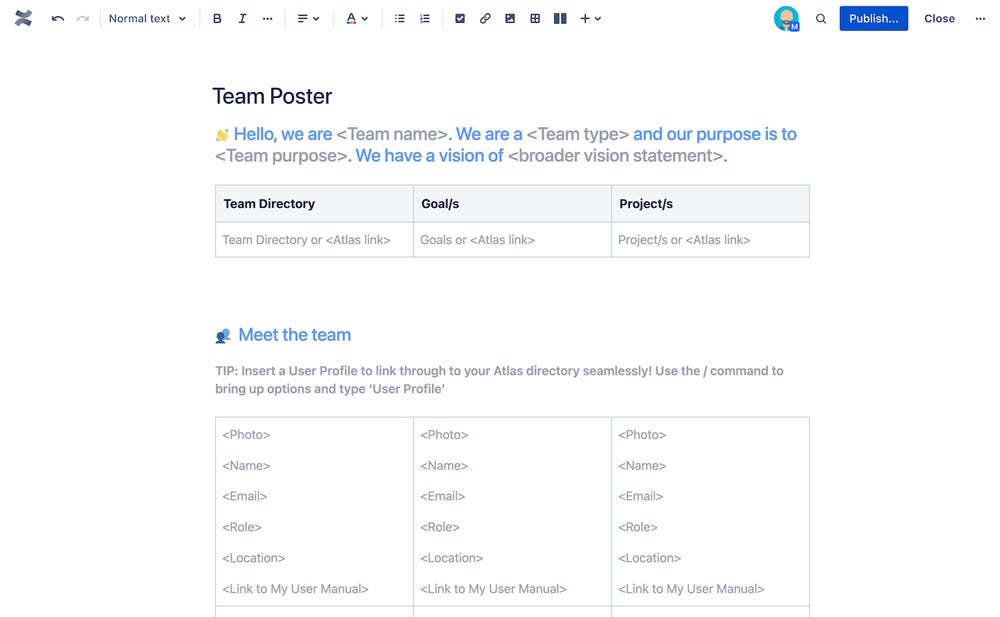
While you can build a project in Jira from scratch, you will save yourself a lot of work by choosing and customizing one of their pre-existing templates. First, head on over to Jira’s template library and browse the templates that are designed for your team (we’ll be using the project management template for the purposes of this guide).
- Once you find a template that you like, hit the big blue “Use template” button on the right hand side of your screen.
- A pop-up will ask you to either select an existing Jira site or create a new one.
- Make your selection, then hit the blue “Create page” button.
- Jira will open in a new tab and ask you to give your project a name.
- Type it in, then click the blue “Create project” button.
Step 2: Invite your teammates to Jira
Assuming this isn’t a solo project, you’ll need to invite your teammates in order to start project tracking in Jira. Even if your teammates don’t have an Atlassian account already, you can still add them directly to your project by clicking the round gray “Add people” button (which looks like a plus sign next to a person icon).
Type in their emails, or add them directly from your connected Google, Microsoft, or Slack accounts. Then select whether each person will be an Admin, Member, or Viewer; which role they are given will determine their permissions and access. Once you’ve got the roles set to your liking, hit the blue “Add” button.
Step 3: Configure your Jira project
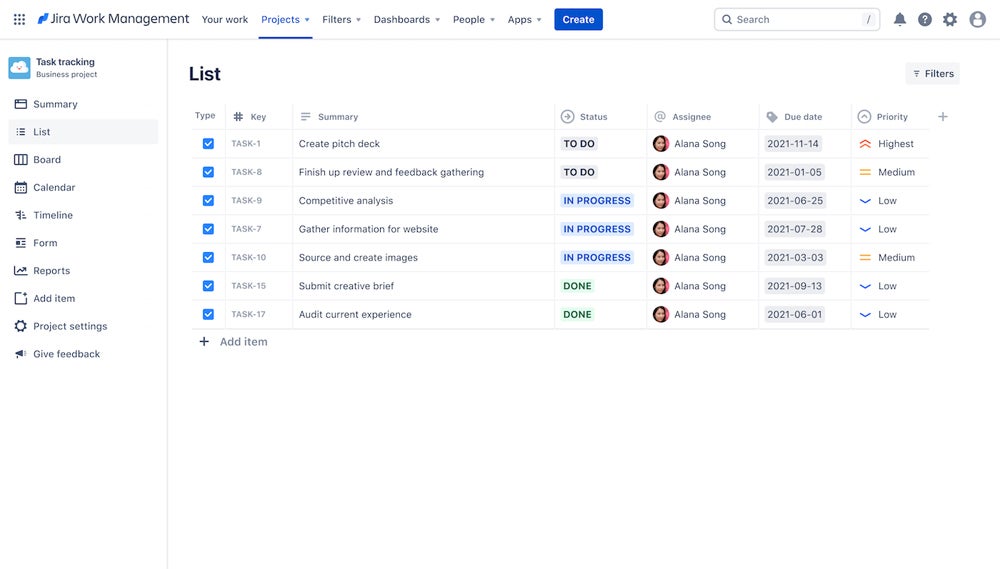
Now that you’ve got your project template set up and invited all your teammates, it’s time to actually configure your project management in Jira. At the top of the project window, you’ll see a horizontal bar that lists multiple project view options: Summary, Board, List, Calendar, Timeline, and so on.
To quickly add tasks, select the List view and hit the “Create” button. Once you’ve entered all the tasks, scroll down to assign each task to a team member and set a due date. If the task isn’t currently being worked on, you can leave the team assignment and due date fields blank to indicate that it’s part of the backlog.
If you want to customize your project even more, update each task’s status, give it a category, set the priority, and add a label. These additional qualifications make it easy to filter your tasks to see only specific ones, which will be extremely helpful down the line as you add more of them. You can also create subtasks beneath a parent task, which keeps complex projects organized.
Step 4: Track your progress
As your team proceeds with your project work, make sure that everyone is updating and checking off tasks as they are completed. If you are new to using project management with Jira, it may take some time and practice to get used to managing your workflows in a new system, so be patient and regularly check in with your team.
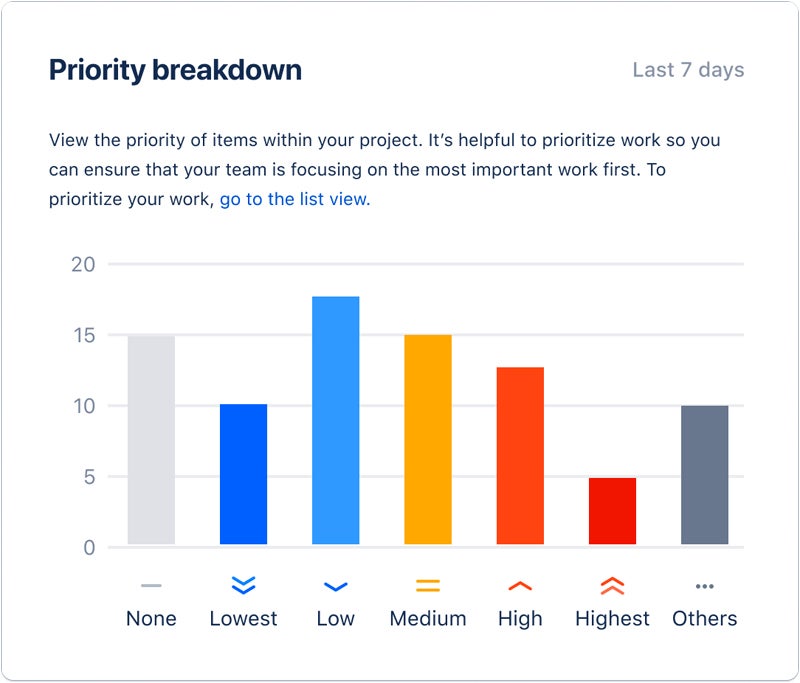
Fortunately, Jira offers several features that enable teams to monitor how they’re doing. The Summary tab of each project acts as a dashboard that summarizes the key metrics of each project. Some of the widgets include a pie chart showing in progress tasks vs. completed tasks, a bar chart that breaks down tasks by priority, and a team workload chart that shows how much work each person has been assigned.
Jira also offers a native time tracking feature, so you can see how much time is being spent on each task. If you need more capabilities than Jira’s native time tracking feature, you can also select a third-party time tracking tool from the Atlassian marketplace.
Step 5: Complete your project in Jira
Once your team has finally checked off all your tasks and completed the project, it’s time to close it out. There are two ways to do this in Jira—read only and archive. If you still want people to be able read the project and copy it, set the permissions to read only. If you want to completely retire the project, use the archive function to remove it from active use.
Key features and benefits of Jira for project management
Template library
Jira offers dozens of templates that make it easy to create a new project and start setting it up right out of the box. These templates are tailored to different teams’ needs as well as different project management methodologies.
Some of the methodologies supported by Jira templates include:
- Agile project management.
- Scrum project management.
- Kanban project management.
- Lean project management.
- Waterfall project management.
Team collaboration tools
There are multiple ways to collaborate with your team in Jira. You can tag each other in comments on tasks and react to them with emojis to show that you’ve read them. You can also integrate Jira with popular work communication tools, such as Slack, so that you can keep using familiar platforms while making sure Jira stays updated.
Automation
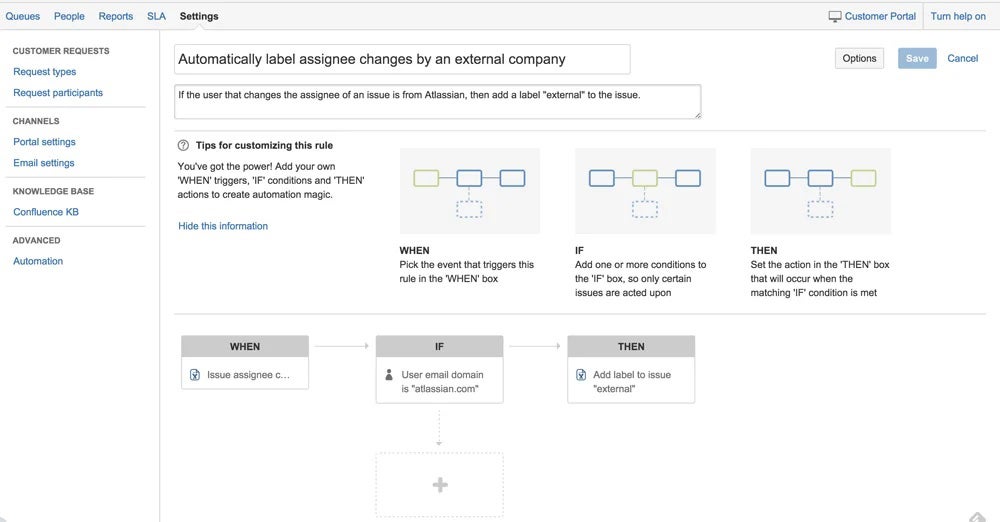
All that time spent updating task statuses really adds up. To reduce needless repetitive work, Jira offers automations to keep things moving without users lifting a finger. Some examples of automations include auto-assigning work, syncing parent and child tasks, and cloning issues. Jira offers a number of pre-built automation templates to choose from, and you can also create your own from scratch as well.
Reporting and analytics
Team-managed projects in Jira get access to four types of reports: the burnup report, the cumulative flow diagram, the velocity report, and the spring burndown chart. Jira also embeds metrics in each project so that you can monitor your progress without having to click over to a separate reporting module. More metrics also appear in the widgets on the Summary tab of each project.
FAQ
Is Jira suitable for project management?
Yes, Jira was designed as a project management solution for software development teams, but it can be used by many different types of teams as well. If you are looking for a simpler project management software with a lower learning curve, we also recommend checking out Trello, another Atlassian software that specializes in kanban boards for project management.
How to use Jira to track project progress?
Jira embeds metrics directly in the project views so that you can monitor your project progress as the work is completed. The deployment frequency and cycle time insights make it possible to optimize your workflows as you go. Once you’ve completed a few projects in Jira, it will also be able to project insights and analytics from the backlog to help you improve future projects. Jira also provides a native time tracking feature, or you can enable a third-party time tracking.
Can Jira do Gantt charts?
Jira offers two slightly different Gantt chart options, called Timeline and Roadmaps. Timeline displays a Gantt chart for a single project or team. Roadmaps display Gantt charts for the entire organization, allowing for more long-term strategic planning.
How do I use Jira as a project manager?
When it comes to using Jira for project managers, first create an Atlassian account and choose a template to use in Jira. Then invite your teammates to your project and configure the project data. Track your progress as you go, then archive the project or change it to read-only once all the tasks are completed.